Our main long-term partner in the creation of powersports stickers is Substance Incorporated. Passion and innovation unmatched in the marketplace, Substance Incorporated is the market leader in powersports technology.
BEFORE YOU START
Inspect the plastics, if they are scratched and scuffed or have major damage, it may be worth replacing them. Before you start installing the dirt bike graphics kit, the dirt bike plastics should be in reasonable/excellent condition.
To install dirty bike graphics, you’ll need: paper tape;
- 1 precision paper/scissors knife;
- hot-air gun or a home-made fire hose
- degreasing agent or alcohol-water mixture;
- scraper (optional)
- Soap and water mixture (Optional)
Wash your hands. It is very important to have clean hands while preparing the surface and working with mx graphics. Oily/dirty hands will reduce the ability of the graphic to adhere.
SURFACE PREPARATION
First, you need to remove the old graphics. The best way to do this properly is to use heat gun to heat the old stickers for easy removal. After that, you’ll need 97%+ purity technical alcohol containing degreasing agent (avoid the greasy ones) and disposable wipes to clean off all the adhesive residue.
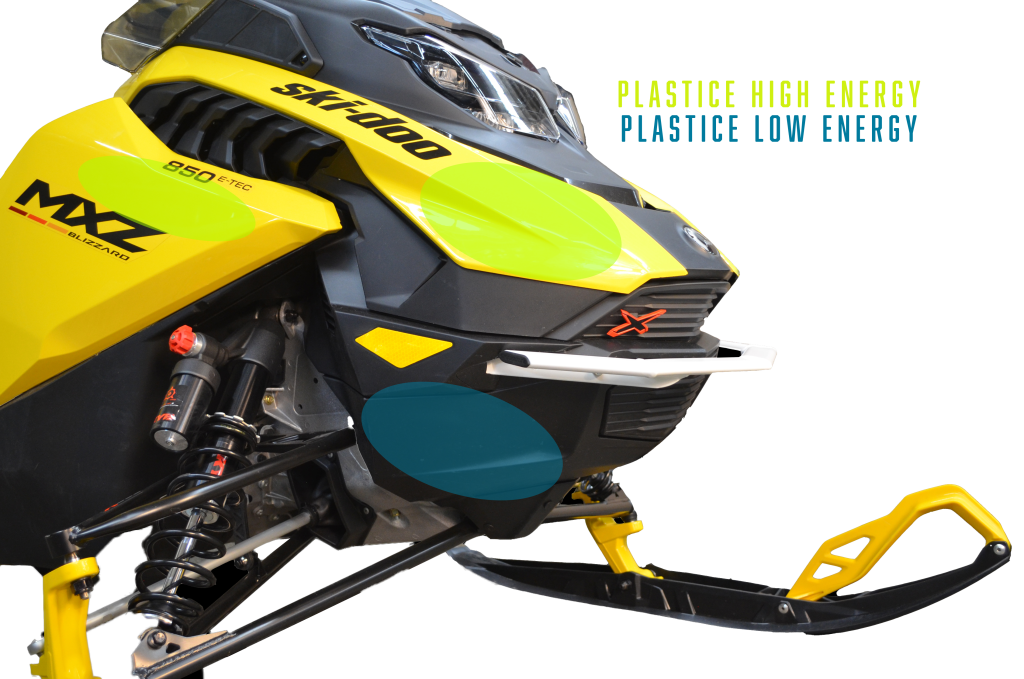
What you need to know about surfaces is that, from Snowmobile, Motocross, Street to SxS, ATVs and skijets, they are all fitted with both LOW-ENERGY (with a more abrasive finish) and HIGH-ENERGY plastics (glossy finish, which goes very much towards the lacquered look of electrostatically painted vehicles).
Why does this matter? Well, the adhesive of our stickers works differently between the 2 and the easy application technique, using soap and water spray, is not recommended for LOW-ENERGY plastics!
APPLYING STICKERS
Place new stickers over plastic (e.g. license plate) using paper tape (what painters use 🙂 ), holding the piece in place. Use as much tape as you need. Peel the backing paper backing all the way down the middle, cut it out. Recheck the alignment on the side to be covered. Touch one side of the graphic with your finger to place it. Working in small sections, use your thumb (or squeegee) to apply pressure to the graphic being careful not to get wrinkles or bubbles. You must work from the center. If you get bubbles, carefully clean the section and try again. Use the safety pin to pop any small air bubbles. Next, smooth out the section with bubbles moving toward the edges of the graph. Repeat the installation process on the other side of the same offset. If you have sharp curves in the plastic (for example, the license plate over the exhaust pipe), use the heat gun to make the decal more malleable.
Be careful not to over-inflate! If you have a fancy cannon, somewhere around 120 degrees from 30 inches 2-3 seconds should be enough.
If necessary – cut excessive sections or sections of the mx graphic that cover screws, access holes or vent slots – we suggest using paper knife.
RECOMMENDATIONS
Watch this video for full details
For a quick guide, check the FAQ Elements page
Before installation do not forget to keep the machine or the plastics at a temperature of more than 18 degrees for several hours.
Arm yourself with patience and free time, it’s a fun activity and it’s not as difficult as it looks! It will take longer the first time because you will act very carefully.


